I must firstly say this is not my design, in fact you can find it out there in Blogland if you look. I saw this demonstrated at the lovely Jo Channon's shop in Coningsby, Lincolnshire. A lady called Shelly showed us how to do it and I just knew I would have to make one (ok, several!) for myself.
I hope the photos explain how to fold the pages. If you have any queries please contact me using the button at the side.
So, first you need to get an old, well read book. It needs to be a paperback as the spine is bound with glue instead of a hardback. Now for the scary part.... Tear the front and back cover off!
Remove the first few pages as they contain very little writing and they will leave blank edges to your tree. You now need to remove approx 160 pages in a solid chunk. The taller the book the more pages you will need to fill the tree. The tree in the previous post was from a book approx 7" tall. Your book should now look like this....
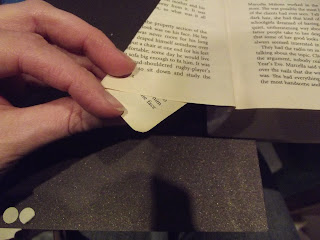
Begin by folding the top right corner down till it reaches the spine... See below.
Now fold this page over till it it level with the spine. Be sure to burnish the creases well.
Turn the page over just as if you were reading the page. You will see you have a little tail poking out at the bottom. Fold this back up so that the edge is flush.
Your page should now look like the one below.
Continue to do this for each page. It will get harder as you go along.
Your finished pages will look like this.... As you fold more and more pages you will notice how the tree is taking shape and that it requires NO glue to hold it together. The finished tree will be extremely solid and hold itself in position with no problem.
Once your tree is all folded you can decorate how you would like. To add colour to the tree just use a sponge and rub your chosen ink colour along the folded edges.
I hope this has inspired you all to give an old book a new lease of life.
Till next time - Happy Crafting


No comments:
Post a Comment